GPTs
Use Connery actions in your OpenAI GPTs to integrate external data or interact with the real world.
Demo
See below a demo of how we use the Send email action from the connery-io/gmail plugin in the GPT to write and send emails.
Information
OpenAI released a custom version of ChatGPT that you can create for a specific purpose — called GPTs. GPTs provide the ability to deeply customize ChatGPT with all new capabilities. In addition to using the built-in capabilities, you can also define custom actions by making one or more APIs available to the GPT. Actions allow GPTs to integrate external data or interact with the real world. Connect GPTs to databases, plug them into emails, or make them your shopping assistant.
With Connery SDK, you can easily create a plugin with actions and use them in your GPTs. See below how to set up Connery actions in your GPT.
- Actions in GPTs in OpenAI docs.
Configuration
Prerequisites
- Use this guide to set up the plugin server with actions you want to use in the GPT.
- Prepare an OpenAI GPT where you want to use the actions.
Make sure your plugin server has PLUGIN_SERVER_URL environment variable set to the actual URL of the plugin server.
The value of the PLUGIN_SERVER_URL is used in the OpenAPI specification to let the GPT know where to send the requests to run the actions.
Set up actions in the GPT
Once you have the plugin server up and running and the GPT ready, you can continue with the following steps to set up actions in the GPT.
Get the OpenAPI specification with all the actions from your plugin server.
Use the Interactive OpenAPI docs to request the
/api/specs/openai/gptsendpoint and get the OpenAPI specification for the OpenAI GPTs.Or send the following request from the terminal:
curl -X 'GET' \
  '<PLUGIN_SERVER_URL>/api/specs/openai/gpts' \
  -H 'x-api-key: <API_KEY>'
Replace
<PLUGIN_SERVER_URL>and<API_KEY>with the actual values of your plugin server.Copy the OpenAPI specification from the response and save it to use in the next steps.
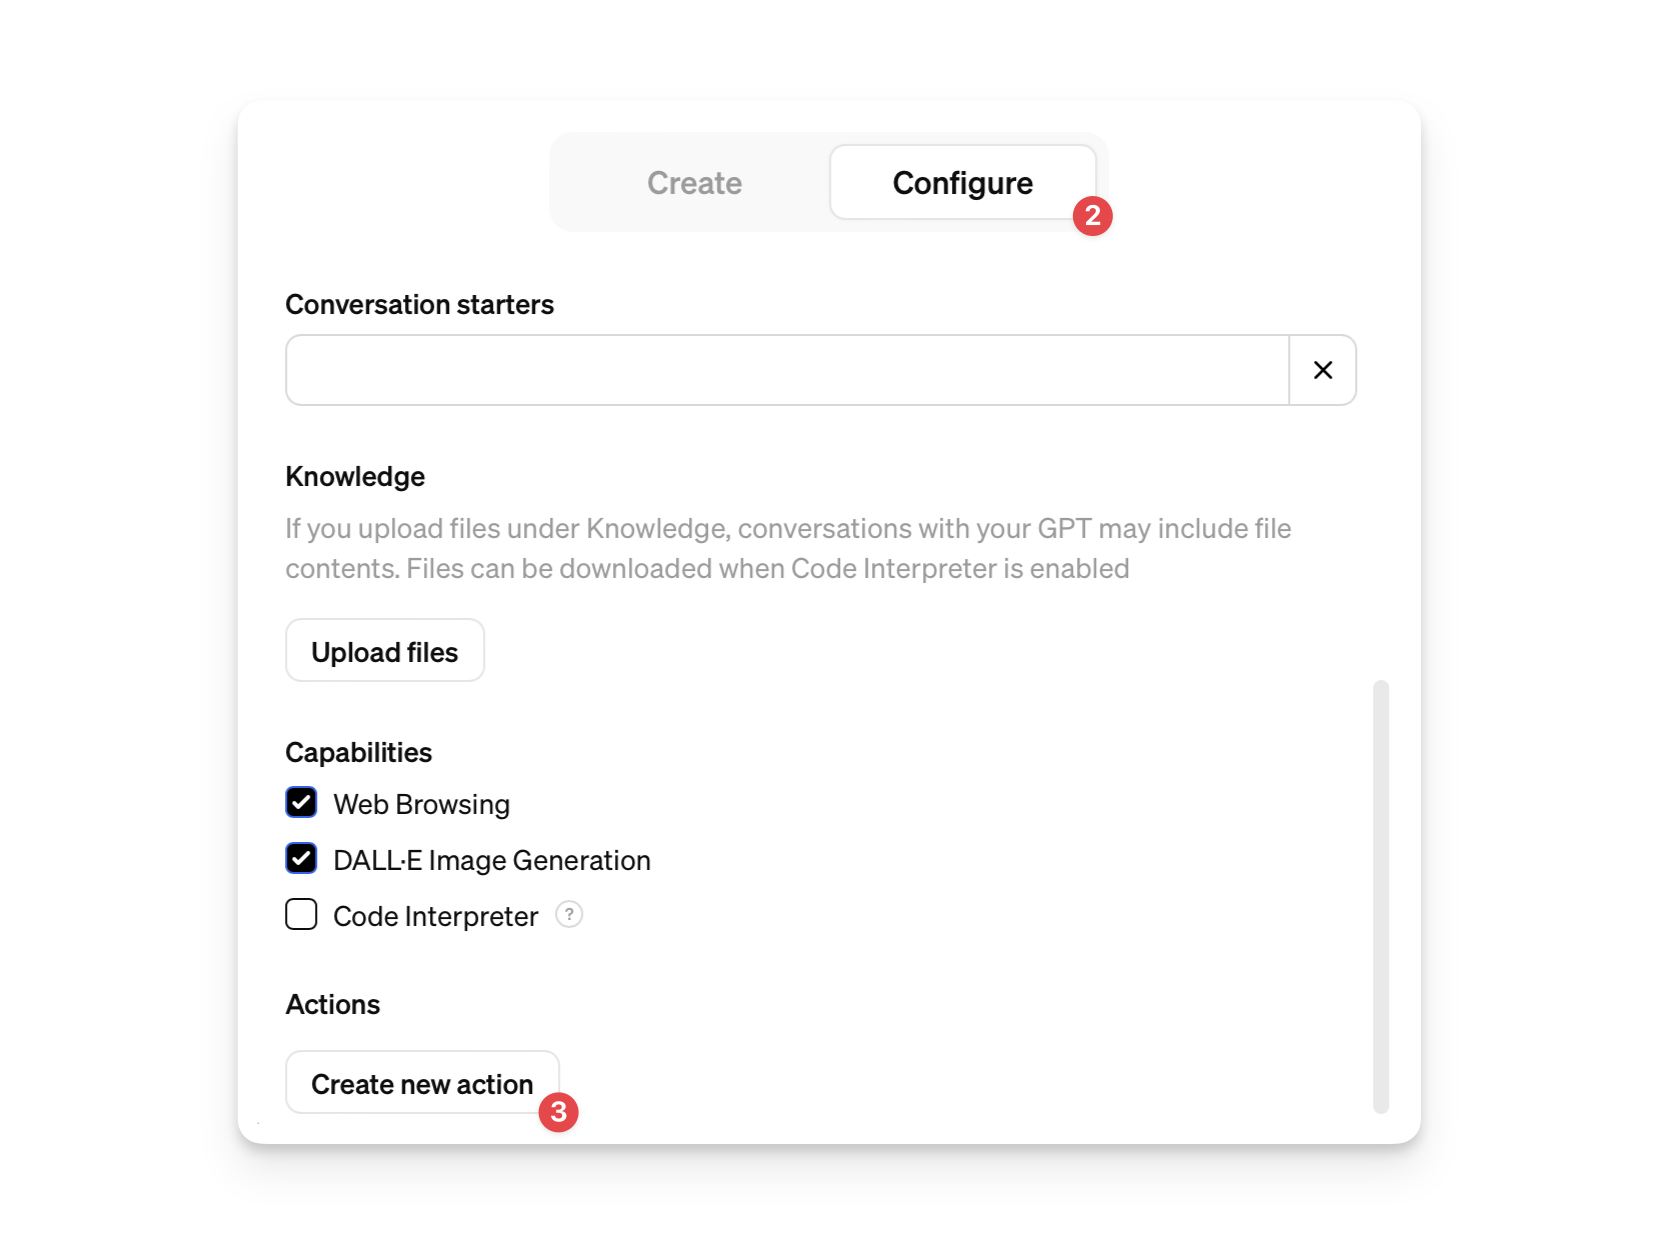
Open the Configuration section of your GPT.
Scroll down to the Actions section and click the Create new action button.

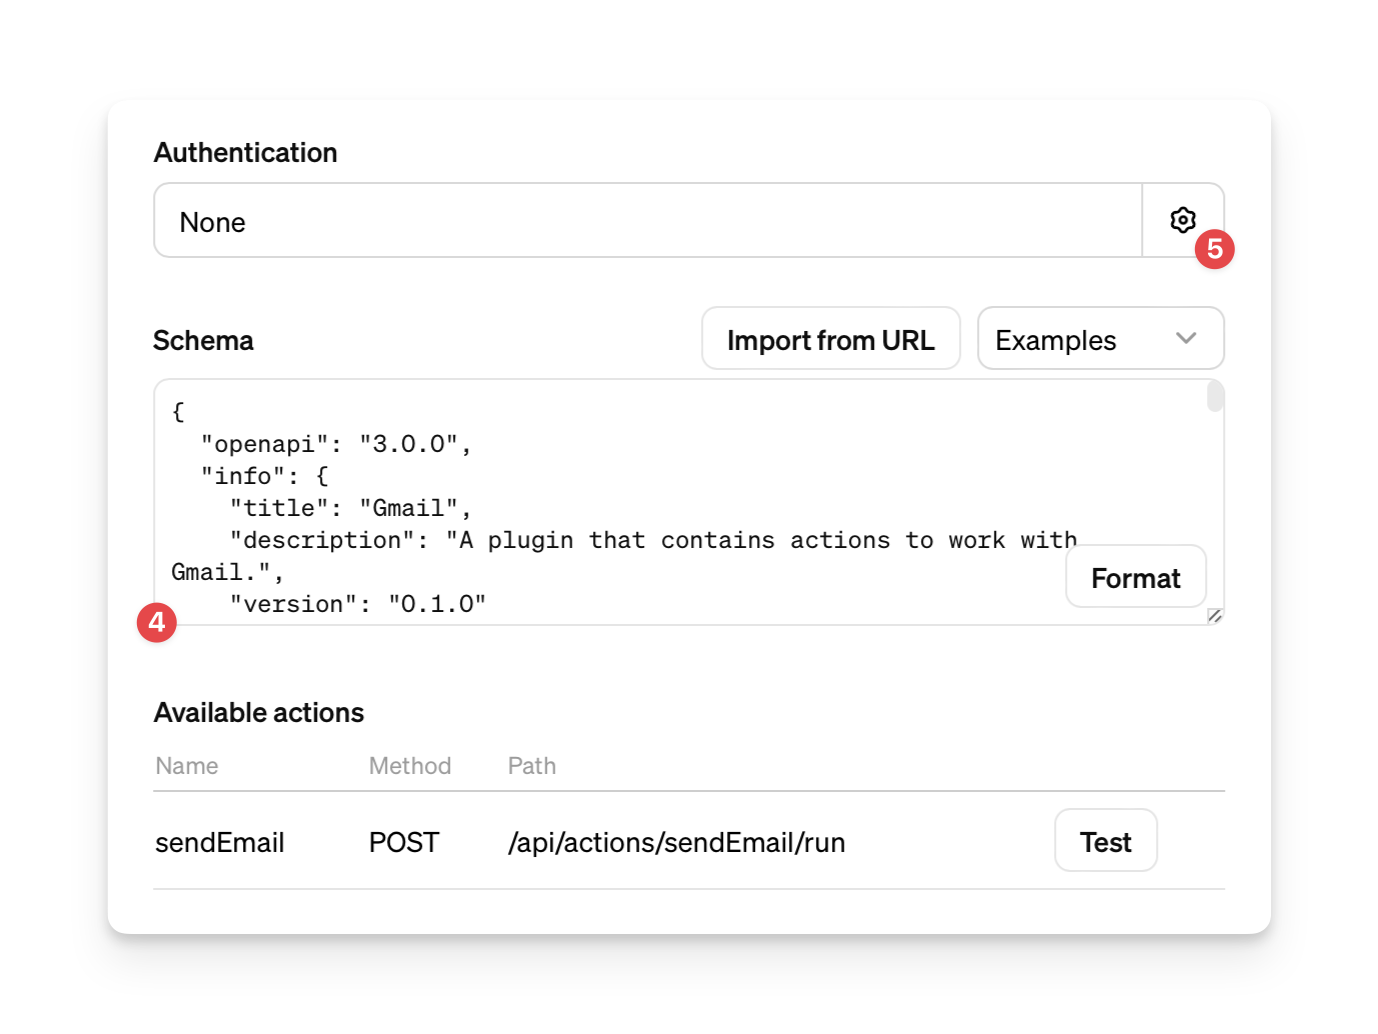
Paste the OpenAPI specification you got from the plugin server into the Schema field.
It should automatically load the actions from the specification and show them in the Available actions section under the Schema field. Check the list of actions imported from the OpenAPI specification.
Click the Gear button in the Authentication section to configure the authentication method for the actions.

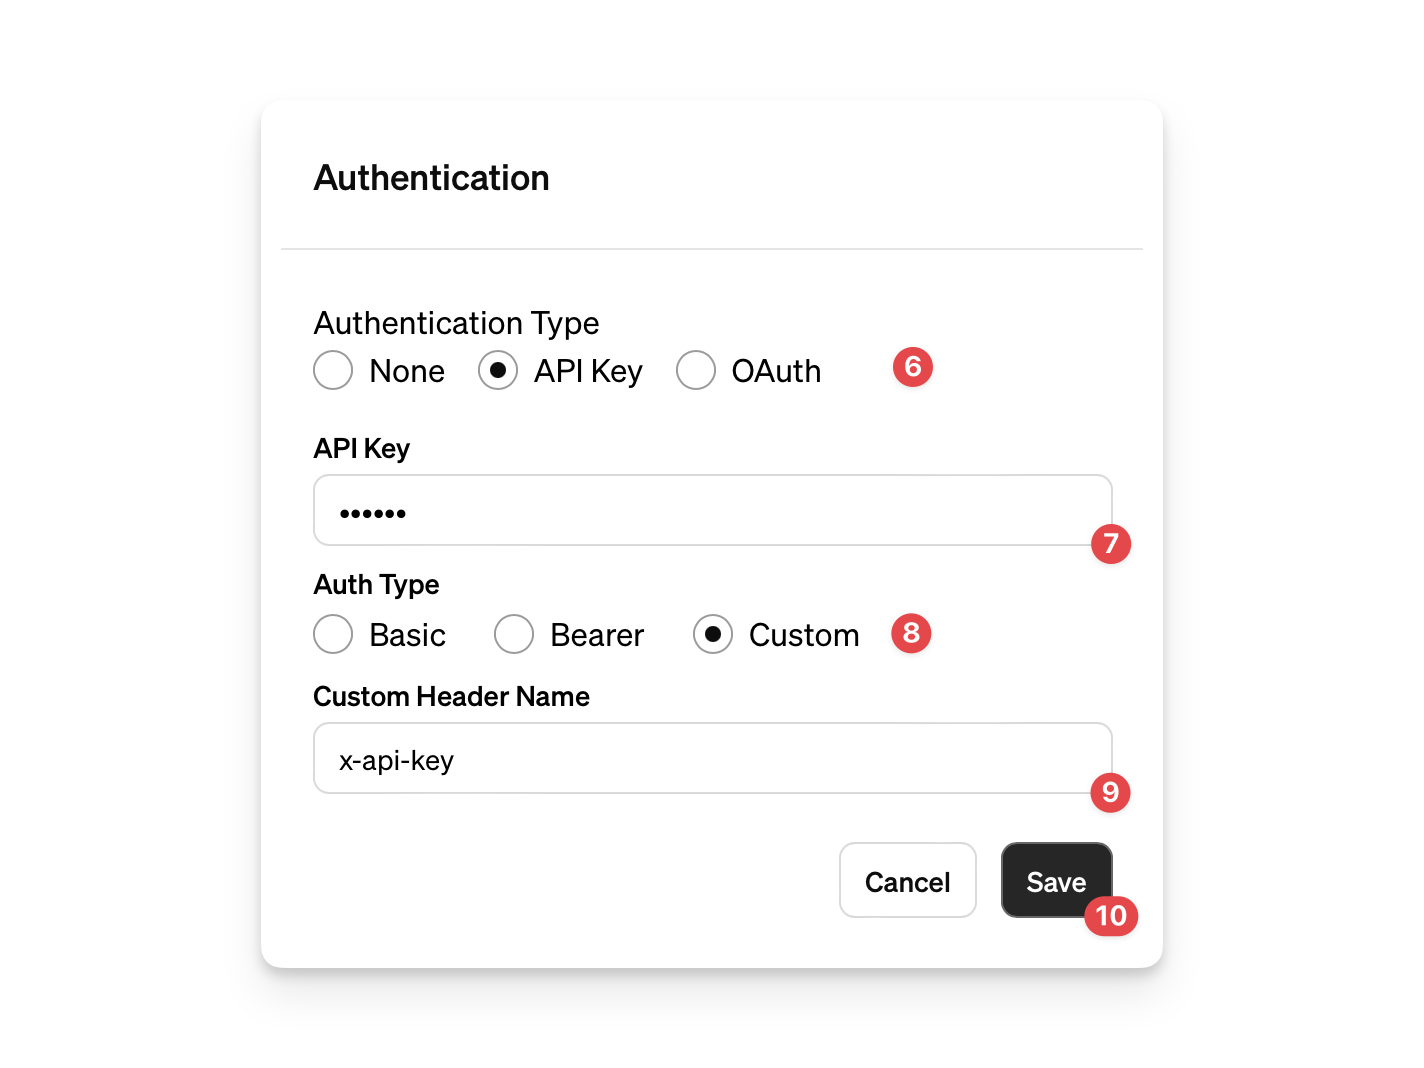
- Select the API Key authentication type.
- Paste the API Key of your plugin server into the API Key field.
- Select the Custom auth type.
- Use the
x-api-keyas a Custom Header Name. - Click the Save button.

- Press Update on the top right corner to update the GPT, then press Confirm and View GPT.
Now, you're ready to use the actions in your GPT.